Thank you for all of the great responses you guys sent in for the Wardrobe Help Survey!
After reading the survey responses it was evident that wider questions about wardrobes were begging to be addressed. I wanted to squish them all into a neatly packaged series, but it got overwhelming so I decided to scrap the Work Your Closet series idea and turn it into a regular part of this blog. That way, we can cover topics like closet organization, finding your style, shopping for your body type, etc. over the long haul.
Today, I really want to start the posts on building a remixable wardrobe. Again, I’m not an expert. Remixing doesn’t come naturally to me and I had to learn it (and am still learning). These are just some things I’ve learned so far.
Intro
What is “remixing”?
First of all, let’s clarify the lingo. “Remixing” is basically another term for mixing-and-matching your clothes to use the same pieces to create a variety of different outfits. I think it was made popular by Kendi, who hosts a 30-for-30 remix challenge in which you create 30 different outfits using only 30 articles of clothing.
When I first tried to participate in a 30-for-30 before I had this blog was when I realized I had created a closet full of one-hit wonders. I basically had no concept of how to use one piece in more than one way, and even when I tried I didn’t have the right pieces in my wardrobe to be able to do it.
3 Things I Needed to Learn
I was determined to figure it out, and after much closet analysis and studying people who did it well (aka stalking Kendi’s blog like a creeper) I realized I needed to do a few things:
- Be able to reimagine garments and not just take them as is.
- Learn to shop for pieces that could be versatile.
- Add the right pieces that would serve as building blocks to create foundation for mixing and matching.
Today’s post is dedicated to unpacking the first one–reimagining garments.
Okay…for example, I only ever wore this shirt like this:
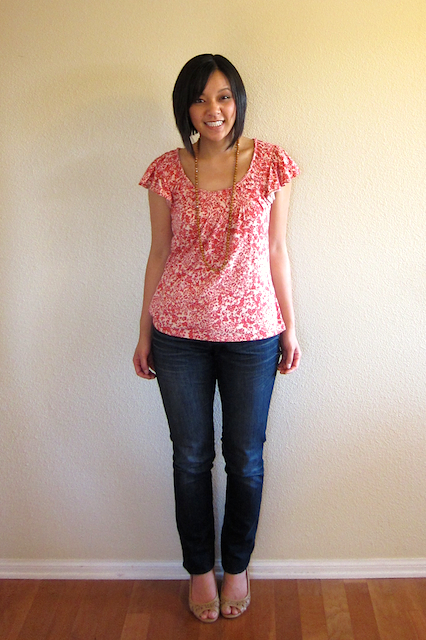
I never wore it with anything but skinny jeans because, since it was flowy and not fitted, it created a weird silhouette with a skirt. Then I realized you could tuck almost any shirt into a skirt, and voila! New outfit possibilities!


Can you believe I stopped wearing skirts because I couldn’t find shirts that fit with the skirts? To think, all it took was a little tucking! Here’s another example:

Other things I learned you could do with shirts are to belt, tie, or partially tuck them. I wouldn’t have bought this shirt because it’s a little baggy and long, but after using those tricks, I can do a lot with this shirt.


Pants
I also learned I could roll up pant legs. I generally avoided rolling my pants for fear of cutting off my leg line and making my legs look shorter. Sometimes that happens, so it doesn’t work. But sometimes, if I roll the pant leg at the right width, it works and adds a cute dimension to the whole outfit. It’s all about experimenting!
Besides adding some dimension to my outfit, rolling my pant legs was important was because it opened up more shoe options. For instance, my beloved booties before rolling and after:

The booties looked funny with jeans, so I may have never worn them with pants. Rolling up the legs made it work! Other outfits where I roll my pant legs: (1, 2, 3)
And, don’t even get me started again on how rolling up the legs revived this pair of jeans!

Cardigans
Like I said in a recent post, I learned I could wear a belt over a cardigan to give my outfit some shape. Here is the outfit with and without a belt:

What a difference, right?!
You can also button the cardigan first and then belt it:

Again, it’s just about experimenting, and the point is that you have more control over the clothes than you think!
Dresses
I tend to buy dresses with defined waistlines and therefore I never thought to wear a belt with them. Why bother, when the shape was built into the dress? But style blogs taught me that adding a belt anyway can change the look of the dress to make it more versatile. (Sorry, I didn’t have time to take pics of that, but if you flip through my dresses label you can find a billion posts of me in dresses and belts, and often the same dress remixed.)
Adding a belt to a dress can also anchor the look:

This dress already has a built-in waist line, but it wasn’t strong enough to combat the bagginess the cardigan created. Adding a belt anchors the outfit and pulls the look together.
Belts
Lastly, after all this talk about belts, I should say that I didn’t own a belt before reading style blogs. I always bought pants that fit such that I didn’t need a belt. Also, a belt typically used around my hips to hold up my pants would be way too long when used on my waist and excess belt would be hanging out like so:

It seriously sounds so silly that I never knew what to do with the excess. I didn’t know I could just tuck it in place, so I never wore belts because I thought I had to get two different sizes of every belt–one for my waist and one for my hips. Finally, I discovered you could do a lot of different things with the excess belt:

I also want to add that many women have commented and emailed saying that belts do not work for them because of their larger frames. PLEASE do not discount yourself from being able to wear belts because of your size–that makes me sad to hear because it does not have to be true! If you need visual proof that belts might work for you as a plus sized wearer, please check out this guest post on Tips for Belting Your Curves. Also, check out two beautiful and stylish bloggers who have larger frames than me: Hems for Her and Animated Cardigan. I’m not saying it’ll work for everyone, I’m just saying to give it a shot because you might be surprised.
Also, please keep in mind that belting is *not* the only way to give your wardrobe versatility. There are four other parts to this series for you to check out below that don’t involve belting, and some can be done regardless of your size or shape.

Join Us in the PMT Style Club!
Hey there! If you love playing with new styles and want to be around other style enthusiasts, join us inside the PMT Style Club!
In it, we have fun honing our style, experimenting with new things, and learning from experts, like color specialists, petite experts, plus size experts, and more.
We also have monthly style challenges to keep things fresh and make it FUN to get dressed!